Let’s say you are tracking down a bug where a page on the live site behaves differently than the same page in the local environment. There is a way to run tests of the live code via Chrome Developer Tools that does not require pushing test code to production. It is called “overrides”:

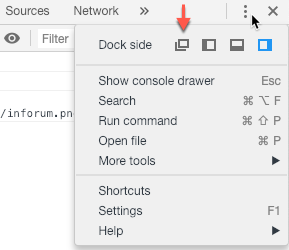
Step 1: Open Developer Tools in a separate window
Right click and Inspect something on the live page you are troubleshooting. Then choose the below docking option to open dev tools in a separate window:
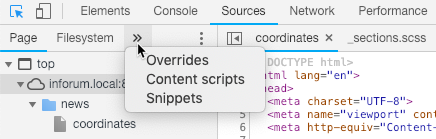
Step 2: Select Overrides
Go to the Sources tab and on the left side of the screen you will see Filesystem. Click the double arrows >> and choose ‘Overrides’:
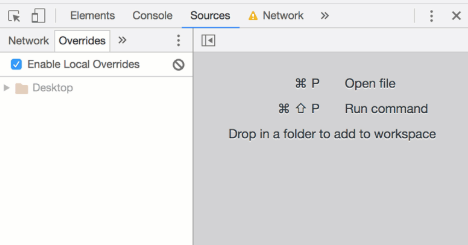
Step 3: Set Overrides location
After selecting Overrides and checking the “Enable Local Overrides” box, type command + P in order to select a file location for your overrides.
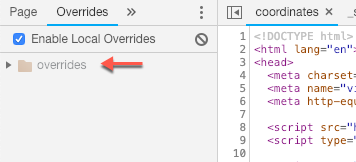
If you want to create a file called “overrides”, type it into the dialog box. You should now see the overrides location appear on the left:
This is where the changes you make and save to the source code will live.
Step 4: Edit and test changes to the live site!
Now in the Sources tab, you can make changes to the production source code and save the changes with CTRL + S. The saved changes are stored in the overrides folder. Refresh the original production page that you wanted to test to bring in the changes. Then you can switch to the Console tab to see the results of any console.log statements you added.
Note: When testing is complete and code changes have been copied to the actual repository, you may want to delete the saved changes in the overrides folder or disable Overrides via the checkbox. Otherwise, Chrome will use the Overrides by default whenever you visit that page.
For more about Google Chrome overrides, see:
https://developers.google.com/web/updates/2018/01/devtools#overrides