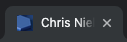
A Favicon is the little icon that appears next to the name of your site in the browser tab where your site is open. For example, here is what the Chris Nielsen Code Walk blog Favicon looks like in both Chrome and Firefox:

A favicon can be any square image, but since it is going to be shown very small, the image should be simple enough so that it is easily discernible at a small scale. Images that are too complicated won’t translate well to the small form factor. WordPress recommends favicons that are 512 x 512 pixels in size, but this doesn’t have to be adhered to as long as the image is square. The favicons that I created for this blog are 350 x 350 pixels, saved as a .png.
Note: The favicon can be .png, .jpeg, or other standard web image formats.
A Favicon image can be created with whatever image editing software you like and then imported into WordPress. Or, if you already have an image in your WordPress media library that you want to crop for a favicon, WordPress makes that easy to do also. In this article I will show how to set up a favicon using both options.
Note: I am using WordPress 5.1.
Option 1: Importing an image to use as the site favicon
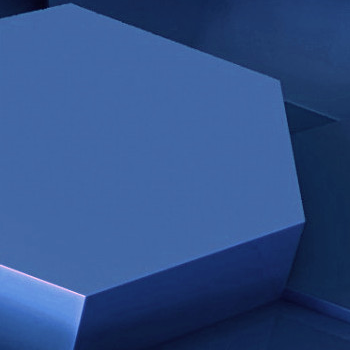
In an image editing program, I saved a square portion of my header as “cncw-favicon2.png”. For example:
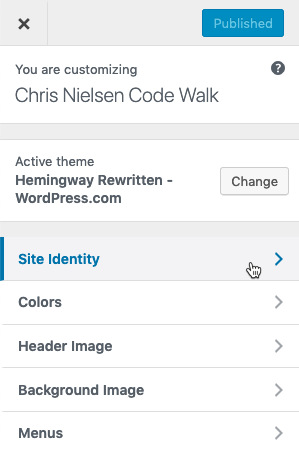
To use this as the favicon for my WordPress blog, I went to the admin portion of my blog and selected:
Appearance –> Customize –> Site Identity –> Site Icon –> Change image


Clicking Change image will open up the WordPress media library, where you can either choose an existing image or upload a new one.
Once the image is chosen, click the “Publish” button at the top.
Option 2: Cropping an image that is already in the Media Library
This option requires all of the same steps as Option 1, except instead of adding an outside image to use for the favicon, you would instead select an image that is already in the Media Library modal. Selecting an existing image and then clicking the “Select” button in the modal will launch a crop screen in the modal that is already set up to crop a square for the favicon. For example:
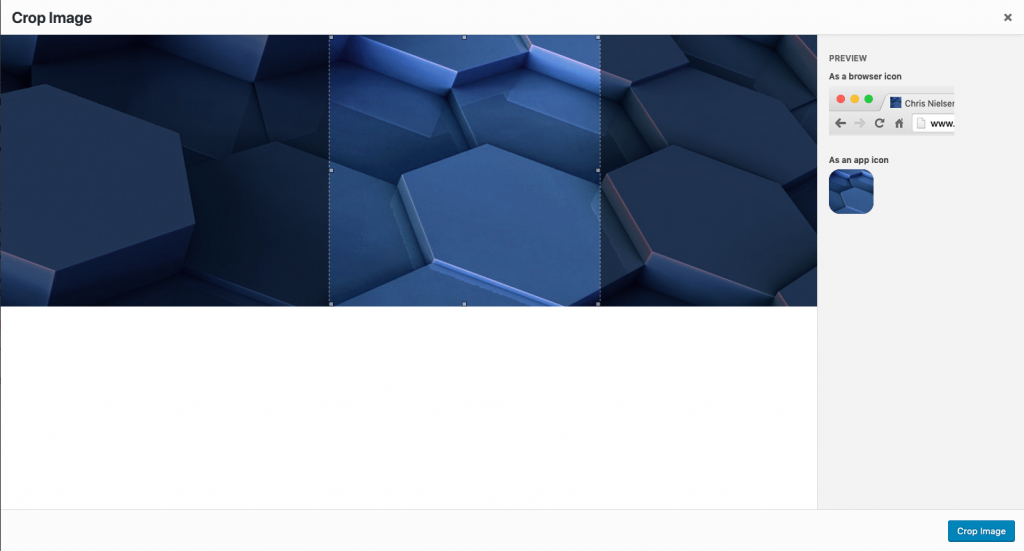
Once your crop is selected by dragging it around the image and stopping where you’ve found the crop that you want, just click the “Crop Image” button in the lower right corner of the modal.
The last step is to click “Publish” at the top of the “Customizing Site Identity” tab in WordPress.