When starting on the journey of learning the Kotlin language, it is a good idea to get an initial impression of the language by creating and running the simplest possible program in Kotlin. That is what I will describe how to do in this article.
The first step assumes that you have already downloaded and installed the IntelliJ IDEA editor, which was created by Jet Brains specifically for Java and Kotlin. This can be downloaded from here:
https://www.jetbrains.com/idea/

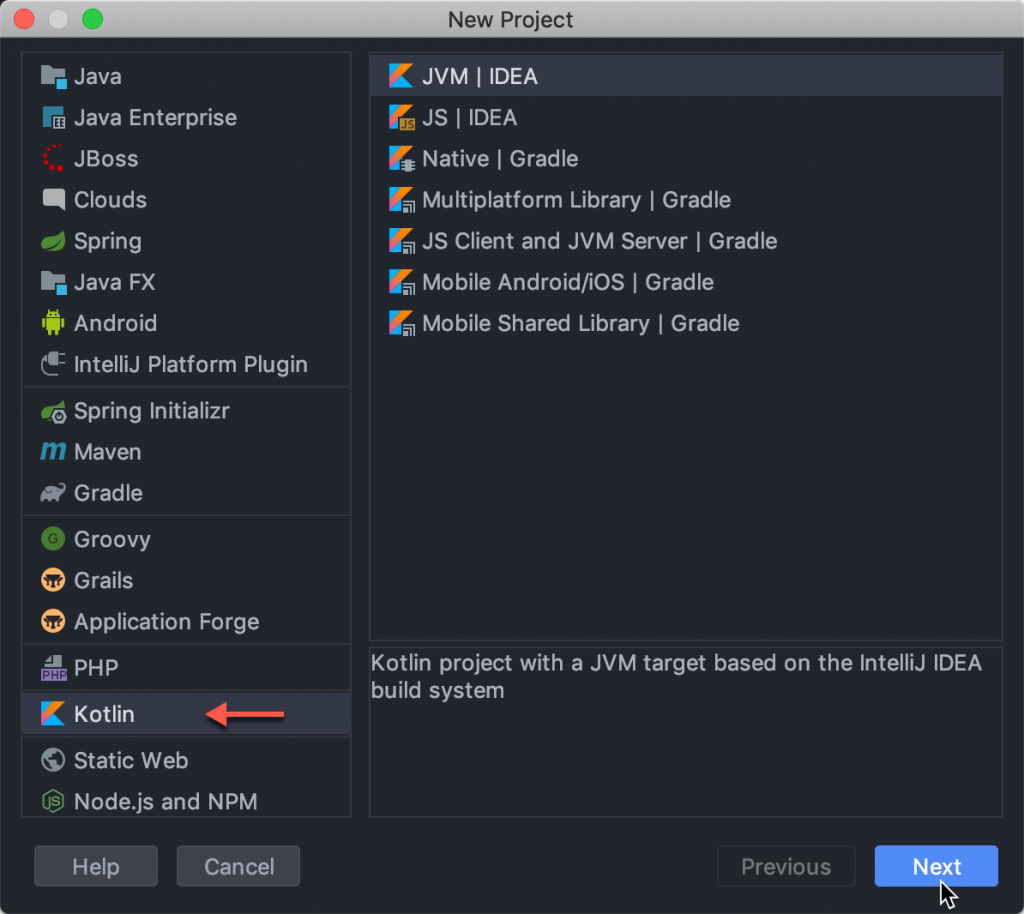
The first step after launching the program is to click “Create New Project”. Then you should see this dialog, where you should choose Kotlin from the list in the left column:

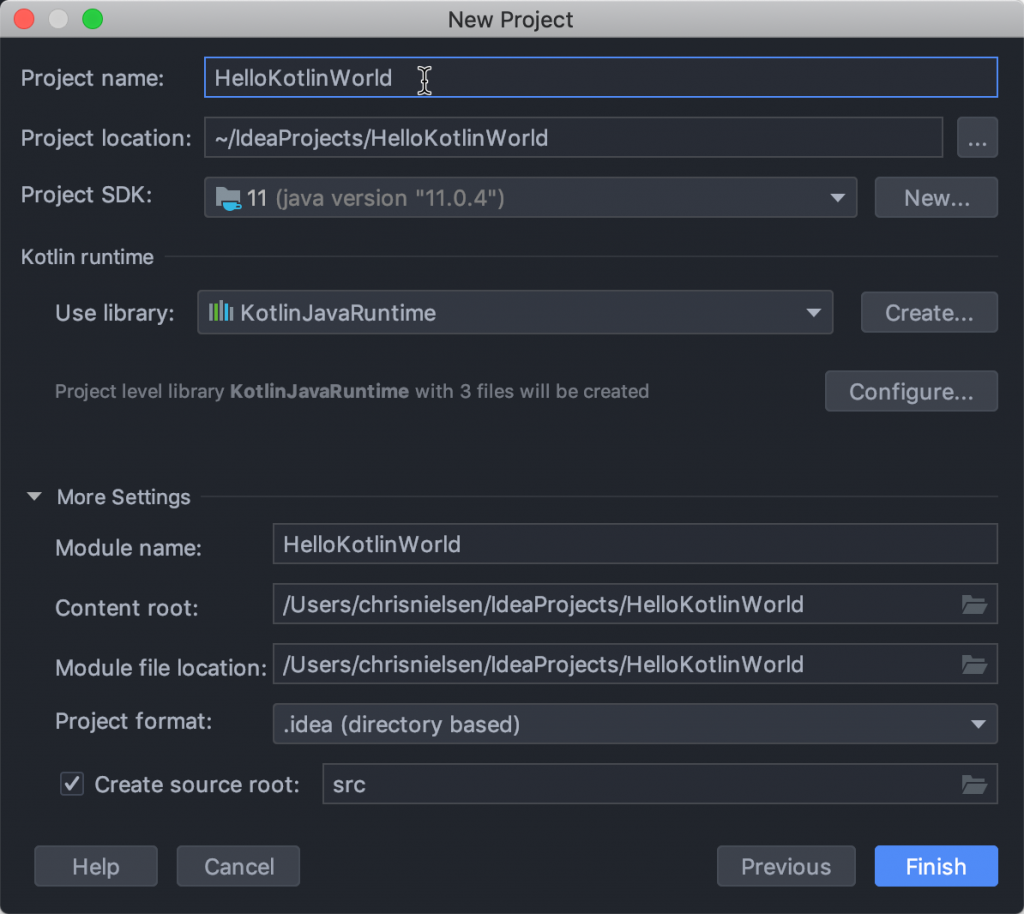
After clicking “Next”, there will be a “New Project” dialog that opens. In the “Project name:” field at the top, give your project a name. I chose “HelloKotlinWorld”. As you type this in, you will see the name populate in several other places below.

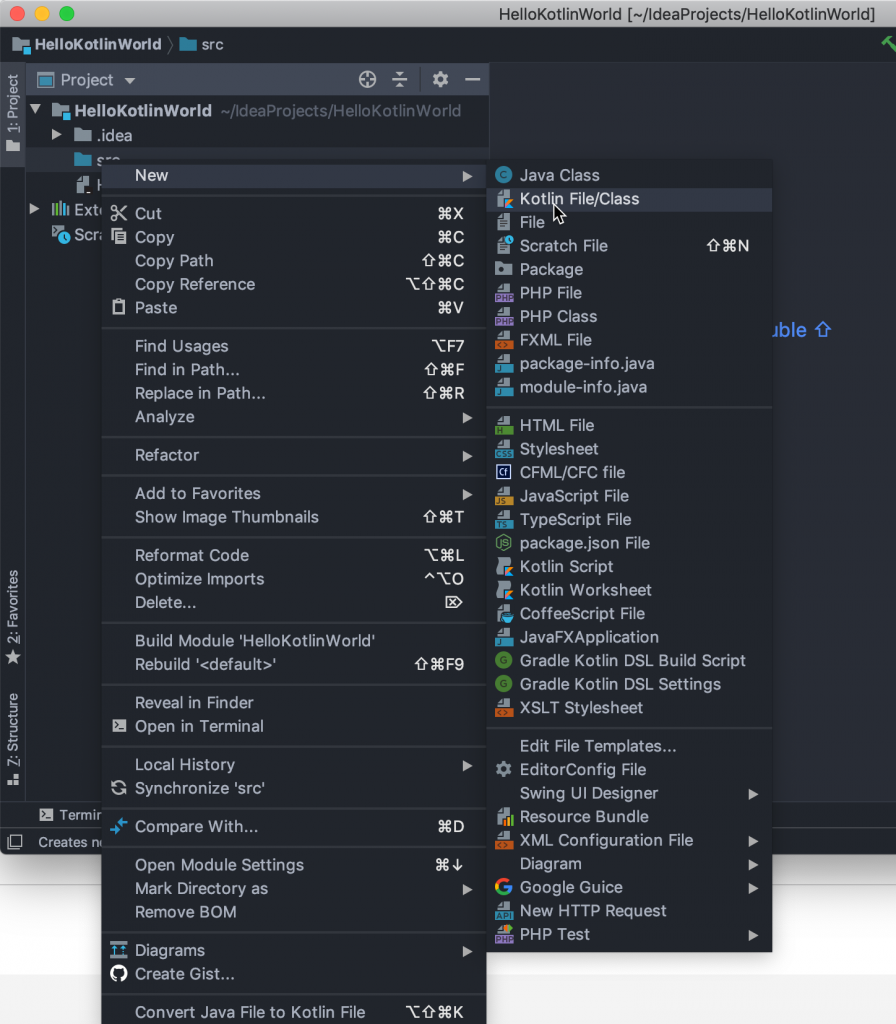
The new project will appear under “Project” in the left pane. Right click on the “src” folder to create a new app. Choose the “Kotlin File/Class” option near the top.

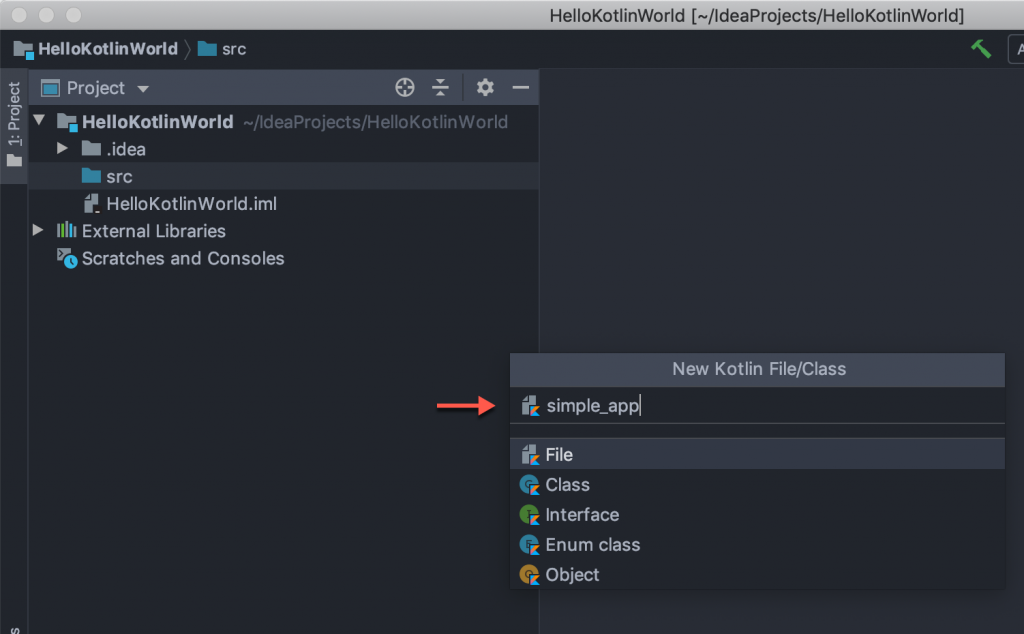
Then a small dialog will open up where you can give your app a name. I chose the name “simple_app”.

After clicking Enter (return) on your keyboard, you should now see the new app listed in the Editor as a .kt file.

Now for the code! In the editor pane on the right, type “main” and click TAB. This is a shortcut that will create the main function in IntelliJ IDEA. For example:

Now to get the main function to do something, type the following println():
fun main() {
    println("Hello Kotlin World!")
}
Next, to run the simple app, click the green arrow in the gutter next to the code pane, and choose the Run option at the top:

Kotlin is a compiled language, so you will immediately notice that running the app initiates a compile:

When the program is done compiling after a couple seconds, a console window will appear at the bottom of the Editor window, displaying the output of the println():

Success!